Replaces
This part doesn’t fit a . Select from parts that fit.
Frequently bought together
Item Condition:
New
Lifetime Warranty
This item is backed by our limited lifetime warranty. In the event this item should fail due to manufacturing defects during intended use, we will replace the part free of charge. This warranty covers the cost of the part only.
FREE Shipping is standard on Orders shipped to the lower 48 States (Contiguous United States). Standard shipping charges apply to Hawaii, Alaska and US Territories. Shipping is not available to Canada.
Expedited is available on checkout to the United States, excluding Alaska, Hawaii and US Territories as well as P.O. Boxes and APO/FPO/DPO addresses. Final shipping costs are available at checkout.

Created on:
Tools used
Hi, I’m Mike from 1A Auto. We’ve been selling auto parts for over 30 years!
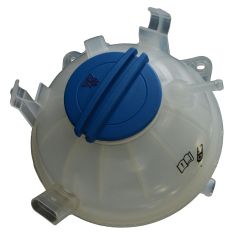
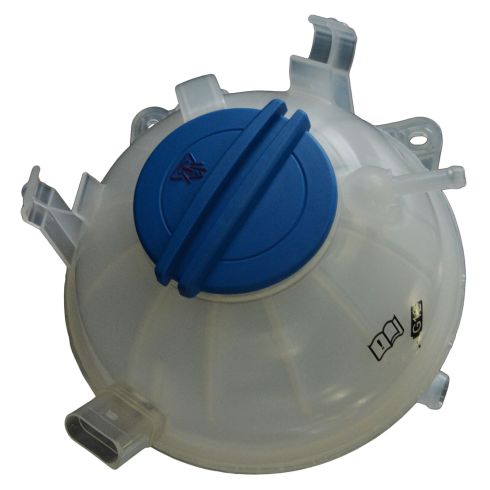
In this video, we are replacing a Radiator Overflow Bottle in a 2010 Volkswagen GTI. If you need this part, or any other part for your vehicle, click the link in the description and that'll bring you over to 1AAuto.com.
This is the coolant reservoir we're going to be removing. We want to start by taking out this 10-millimeter bolt for the washer fluid fill. 10 mill out. Now we're going to pull the washer fill out of the way.
Next we're going to pull off the cap, make sure this is cold, because otherwise you're going to have pressure and it's going to have a lot of coolant come out. We're going to pull this hose off. You need some pliers to take off the clamp. We're going to use a right-angle pick and get in underneath here to break the seals. Sometimes you can just twist the pipe back and forth the hose. We'll go right around, that'll break the seal, and pull right off.
Next we're going to disconnect this connector. You're going to use a small flat-bladed screwdriver, pop it and pull it right out. We're going to pull this wiring harness out of your way. We're going to use a T-25 and an extension and a small ratchet. I'm going to get these two fasteners back here.
Make sure you want to have a drain bucket underneath because you're going to lose a little bit of coolant. Pull this out of the way. We are going to put a hose clamp on here so that we don't lose too much coolant, but there is going to be coolant in the reservoir you're going to lose. Take this clamp off, I'm going to use pliers again. Push down the hose. Grab the hose and pull, twisting. There's our reservoir.
As you can see this is our old one. This is our new coolant reservoir from 1AAuto.com. They look identical. You can see the minimum coolant level specs right there. You can see it comes with a cap. It's the same as the original, they look identical. Coolant level sensor right there, you can see the connectors are the same. All the mounting brackets are all the same. You can order this at 1AAuto.com and be ready to rock and roll.
Hook up the lower pipe to the reservoir. Push it on. Once it's on, we can pull off this clamp, get it out of the way. We can move this hose clamp with a pair of pliers, just get it lined up and squeeze. Get it on there. It's best to try to get it in the same grooves that it was in before, or close. Get this down in here. Install this hose. With the pliers, move this hose clamp. Before we install these wires around here, we're going to install our T-25s. Snug it down. Remember, it's plastic, so you don't want to go too tight.
Install this wiring harness into these clips. Plug in our connector, until it clicks. Install the washer fill to the bracket. You can use a 10-millimeter socket and ratchet.
Now we're going to top off our coolant. You want to make sure you use Volkswagen approved coolant. When doing this, you're going to want to make sure you run your engine for a while before you drive, and recheck the level to make sure it's okay. In theory, there should not be any air in the motor, but just in case, the vehicle burps and we need to add coolant, we should do so. Install our cap, until it clicks.
Thanks for watching. Visit us at 1AAuto.com for quality auto parts, fast and free shipping, and the best customer service in the industry.
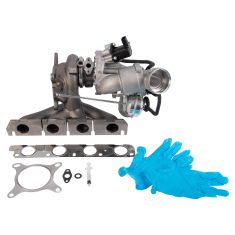
Replaces VW Audi Turbocharger with Exhaust Manifold TRQ TCA15007
$549.95
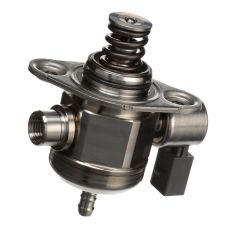
Replaces VW Audi High Pressure Fuel Pump Delphi HM10011
$418.95
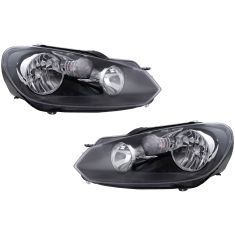
Replaces 2010-14 VW Golf GTI Driver & Passenger Side 2 Piece Headlight Set DEPO 1ALHP01365
$374.95
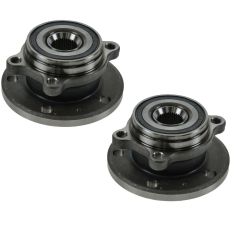
Replaces VW Audi 2 Piece Wheel Bearing & Hub Assembly Set Timken TKSHS00394
$369.95
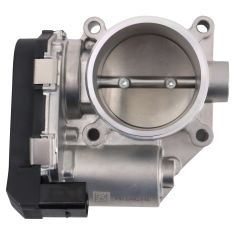
Replaces VW Audi Throttle Body Assembly Hitachi Automotive ETB0081
$323.95
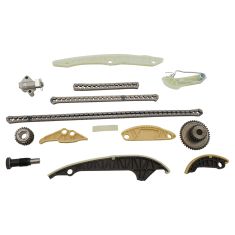
Replaces VW Audi Timing Chain Set Preferred Components Inc TS17171
$309.95
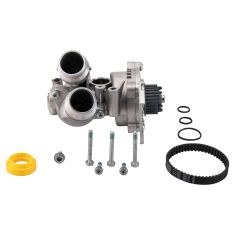
Replaces VW Audi Engine Water Pump Kit Rein WPU0016
$301.95
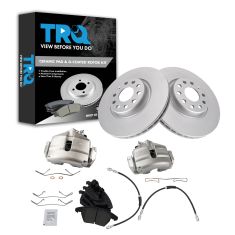
Replaces VW GTI Jetta Audi A3 Front Ceramic Brake Pad & Rotor Kit with Calipers & Hoses TRQ BKA29294
$292.95
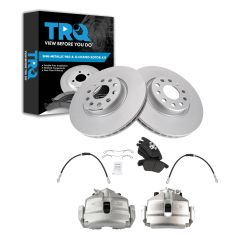
Replaces VW GTI Jetta Audi A3 Front Semi-Metallic Brake Pad & Rotor Kit with Calipers & Hoses TRQ BKA29296
$290.95

Replaces VW GTI Jetta Audi A3 Front Ceramic Brake Pad & Rotor Kit with Calipers & Hoses TRQ BKA29293
$290.95