Replaces
This part doesn’t fit a . Select from parts that fit.
Frequently bought together
Item Condition:
New
1 Year Warranty
This item is backed by our 1-year warranty. In the event this item should fail during intended use, we will replace the part free of charge. This warranty covers the cost of the part only.
FREE Shipping is standard on Orders shipped to the lower 48 States (Contiguous United States). Standard shipping charges apply to Hawaii, Alaska and US Territories. Shipping is not available to Canada.
Expedited is available on checkout to the United States, excluding Alaska, Hawaii and US Territories as well as P.O. Boxes and APO/FPO/DPO addresses. Final shipping costs are available at checkout.

Created on:
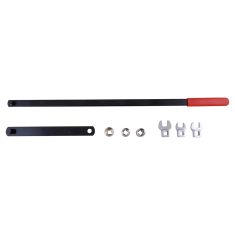
Tools used
Brought to you by 1AAuto.com your source for quality replacement parts and the best service on the internet.
Hi. I'm Mike Green. I'm one of the owners of 1A Auto. I want to help you save time and money repairing and maintaining your vehicle. I'm going to use my 20+ years' experience restoring and repairing cars and trucks like this to show you the correct way to install parts from 1AAuto.com. The right parts installed correctly. That's going to save you time and money. Thank you and enjoy the video.
In this video we're going to show you how to remove and replace the serpentine belt on this 2001 Ford Taurus. The specific routing diagram is specific to this Taurus with a 3.0 liter motor in it, but the procedure itself is pretty much like any vehicle. Loosen the tensioner and either slide the belt off or slide it back on.
You can see down in here, you can see your alternator is here. This is an idler pulley that you can easily see. Then down further here this is your belt tensioner and this is a 15 mm bolt right in the middle of the pulley of the belt tensioner. You want to take a 15-mm wrench and hook it on there. Then if you're really strong you can probably pull on that 15-mm wrench and maybe loosen up the belt and maybe you can hook it on with a little different angle here.
Now I'm going to take a larger wrench, okay, and I'm going to hook it into my 15 mm which gives me more leverage. As I push on this you can see the belt starts to loosen up. Basically, you want to push the tensioner as far as you can clockwise and then take your belt and flip it off your alternator. Then release your tensioner slowly. Then you can basically fish your belt out. It winds all in around.
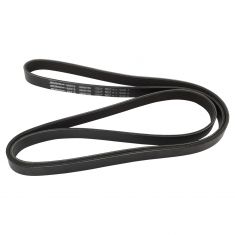
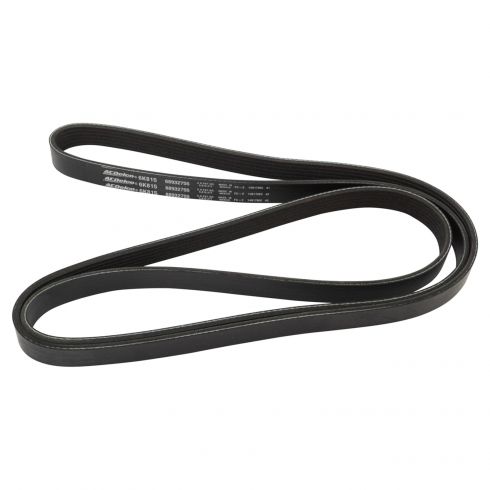
The belt, you want to inspect it. This one is actually in really good shape. You can see the turnover. There's no cracking. Even on these ribs. Okay. You might see some cracking on the ribs. That's not a big deal. What you really want to do is look at the outside and see if there's any wear that's visible. This one is in good shape so I'll put it back on. You usually want to replace your belt every 50,000 miles or if you see any kind of wear on it.
To get the belt back down in Okay, so here's the belt routing diagram for this Taurus with the 3 liter. This is specific just to this car or this series of cars. So, you can see how the belt is supposed to be routed. You can see way down in there you see these little guys sticking out. That is your AC compressor. So, you want to take the belt and I'm kind of turning it to the side. Get it in front of that AC compressor and then down and around. I've just kind of stuffed it
sideways down there and now down here you can see the pulley way down there. That's your crank pulley. So, just carefully put it around that. Then follow your diagram.
Put the belt up here and around the power steering. It goes around the crank pulley and then around the belt tensioner and around the water pump. Then around your idler pulley and then you take this loop and pull it back up towards the alternator. It looks like everything is pretty much in place. There's still quite a bit of tension. Pull on it more. Feel each pulley. Make sure that the belt is on it pretty well. I've got it pulled up and put my 15-mm wrench down on my tensioner. Want to get it at about 11 o'clock or 12 o'clock. Put my other wrench on. Pull the tensioner. Bring it up around the alternator. Make sure it's on the idler and then let the tensioner off. You can just check and look and make sure it's all routed correctly and we should be all set. We'll reconnect the battery, start it up and make sure it's not making any strange noise or doesn't look like it is wobbling or anything.
We hope this helps you out. Brought to you by www.1AAuto.com, your source for quality replacement parts and the best service on the internet. Please feel free to call us toll free, 888-844-3393. We're the company that's here for you on the internet and in person.