Replaces
This part doesn’t fit a . Select from parts that fit.
Frequently bought together
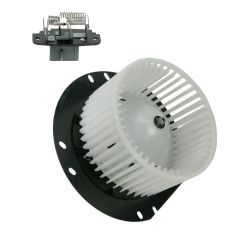
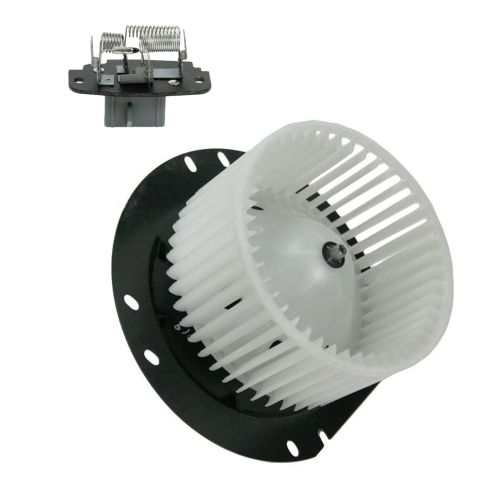
Part Details
Highest Quality Materials
Made from highest quality materials that meet or exceed OEM standards
Quality Tested - built to a strict level of product standards.
Item Condition:
New
Attention California Customers:
 WARNING: This product can expose you to chemicals including Di(2-ethylhexyl)phthalate (DEHP), which is known to the State of California to cause cancer, and birth defects or other reproductive harm. For more information, go to www.P65Warnings.ca.gov.
Lifetime Warranty
This item is backed by our limited lifetime warranty. In the event that this item should fail due to manufacturing defects during intended use, we will replace the part free of charge. This warranty covers the cost of the part only.
Returns: Parts with electrical components cannot be returned once installed.
FREE Shipping is standard on Orders shipped to the lower 48 States (Contiguous United States). Standard shipping charges apply to Hawaii, Alaska and US Territories. Shipping is not available to Canada.
Expedited is available on checkout to the United States, excluding Alaska, Hawaii and US Territories as well as P.O. Boxes and APO/FPO/DPO addresses. Final shipping costs are available at checkout.


Created on:
Tools used
Brought to you by 1AAuto.com-- Your source for quality replacement parts and the best service on the internet.
Hi. I'm Mike Green. I'm one of the owners of 1A Auto. I want to help you save time and money repairing and maintaining your vehicle. I'm going to use my 20- plus years experience restoring and repairing cars and trucks like this to show you the correct way to install parts from 1AAuto.com. The right parts installed correctly. That's going to save you time and money. Thank you and enjoy the video.
In this video I'm going to show you how to remove and install the heater and AC blower motor on this 98 Explorer. The motor is the same for 95 to 05. This procedure will be exactly the same for any 95 to '01; it should be pretty similar for the 02 to 05 as well. Tools you'll need are eight, 10, and 11-millimeter sockets with ratchet and extension and a flat-blade screwdriver.
We're looking under the hood here at the passenger side. First thing we're going to do is remove this little guy which I believe is the server motor for your cruise control. Use the 10-millimeter socket or wrench. Once you get the bolts out, shake it out and put it right up there for now. When we have that aside, you're actually going to want to unbolt your radiator bottle and washer-fluid bottle, which means that first, you have to remove your air box. First, you just want to undo the clips here on each side, then your air box comes up and slides over and then you can lift it up and out. I'm just going to kind of move it over here a little bit. Now, you can just lift your air cleaner up and out. Your air box is actually just into some rubber grommets, here and here and also you can see right into the fender here and here.
To get your air box out, what you're going to want to do is just grab hold of it and you pull up really firmly and it'll pop. Now take a screwdriver and put it under here; that will help you to pop this one out kind of lifting up on that screwdriver, lifting up on my air box and then that one pops. Now, you pull it out this way from the fender. You can actually take out ... off these rubber grommets. You could see, here's the things on the bottom that hold it into the bottom. I would take these grommets and put them back into the fender here.
Now we're going to remove the four nuts and bolts that hold the washer and radiator bottle in place. One there, one there. One right in there and then one right down there. Interesting to note that the nuts that go down onto the fender, the lower nuts are 11 millimeter and then the two bolts that go in to the side of the fender are actually 10 millimeter. I'll quickly just remove those. Once you have them bolted, you just want to lift it up, off the studs and then just slide forwards some just to give yourself a little more room to get to the blower.
Here's your blower motor. You want to disconnect your harness here, just like that. This tube here, just a rubber band kind of, just like that and it comes away. You have four eight-millimeter bolts, one, two, three and then way down there, four. Now you can pull your motor, bring it up, put your harness out of the way; you should see it comes up and out. Here's my original motor, new motor from 1AAuto. You could see the connections are all the same. It does come with a gasket and then it's going to bolt in exactly the same. This motor is actually fine so I'm going to reinstall my original. Symptoms of a motor going bad is it starts making a groaning or high-pitched whining noise and that changes with the different speeds of the fan setting. When you start hearing that, that's when it's time to get a new motor.
You can take this rubber boot out of here and then put your motor down and in. Make sure that the harness isn't caught up behind there. There's little pins here that the motor goes onto, right there and right there. You locate it and now you can put your bolts in and tighten them up. You can take your rubber boot; it goes on right down here. Stick that rubber band around and push it into the side of the motor where it goes. Reconnect your harness attachment. Now you can move your coolant and radiator bottle back in place. Bolt them on. Reinstall the air box, put it in, push the two pins into the fender here. Feel underneath for where the other ones should be going into, locate them, push that down in and put your air cleaner down in. One of these clips is broken. Push the top of the air box over, get the three pins here. Push it down, clip it on, clip it on. Move our cruise servo back into place and you're all set.
We hope this helps you out. Brought to you by www.1AAuto.com- your source for quality replacement parts and the best service on the internet. Please feel free to call us toll free, 888-844-3393. We're the company that here for you on the internet and in person.
Tools used
Tools used
Tools used
Tools used
Tools used