Replaces
This part doesn’t fit a . Select from parts that fit.
Frequently bought together
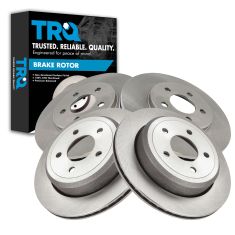
Part Details
Product Features
TRQ brake rotors are manufactured using premium G3000 casting alloy to reduce noise while braking and enhance service life. TRQ rotors have a non-directional finish to minimize the break-in period for new rotors and reduce vibrations throughout the rotor’s lifecycle. TRQ recommends replacing brake pads when you replace rotors to ensure even wear and improved component performance. All products are fit and road-tested in our Massachusetts R&D facility to ensure we deliver on our promise of Trusted Reliable Quality.
Item Condition:
New
Attention California Customers:
 WARNING: This product can expose you to chemicals including Lead and Lead Compounds, which are known to the State of California to cause cancer, and birth defects or other reproductive harm. For more information, go to www.P65Warnings.ca.gov.
Lifetime Warranty
This item is backed by our limited lifetime warranty. In the event that this item should fail due to manufacturing defects during intended use, we will replace the part free of charge. This warranty covers the cost of the part only.
FREE Shipping is standard on orders shipped to the lower 48 States (Contiguous United States). Standard shipping charges apply to Hawaii and Alaska.
Shipping is not available to a P.O. Box, APO/FPO/DPO addresses, US Territories, or Canada for this item.
Expedited is available on checkout to the United States, excluding Alaska, Hawaii.
Final shipping costs are available at checkout.


Created on:
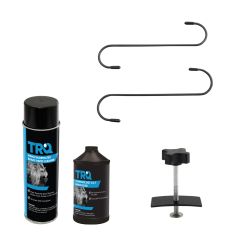
Tools used
Brought to you by 1AAuto.com, your source for quality replacement parts and the best service on the internet. Hi, I'm Mike Green. I'm one of the owners of 1AAuto. I want to help you save time and money repairing and maintaining your vehicle. I'm going to use my 20 plus years' experience restoring and repairing cars and trucks like this to show you the correct way to install parts from 1AAuto.com. The right parts, installed correctly. That's going to save you time and money. Thank you, and enjoy the video.
In this video, we're going to show you front brake replacement, the pads and rotors on this 2004 Crown Vic. This is really the same as pretty much all this generation Crown Vic. Some of the parts differ a little bit, but the procedure is generally the same. Tools you'll need are a large flat blade screwdriver, 13/16 socket or a tire iron, jack and jack stands, 14 mm and 18 mm sockets with a ratchet. You also might need a piece of pipe for some extra leverage. C-clamp and piece of wood, and a wire brush and a torque wrench. First, you want to take off your center cap. Then you want to unscrew these caps. You may need to use a wrench to loosen them up at first. We'll fast forward here through this monotonous stuff, and I do use fast forward throughout the video when I'm just doing repetitive stuff like this. If you're using hand tools, you want to have the vehicle on the ground, loosen up your lug nuts and then jack up the vehicle, secure it and remove the lug nuts. I'm using an air wrench, so once you have the wheel off, then turn the wheels like that.
Now in behind we have two 14 mm bolts, one here and one right down here. Before you remove those bolts all the way, there are two methods. You can see right down there is the piston. You want to force the pistons all the way back. Also just to get them apart. So I'm doing this, taking a big screwdriver here, putting it right in here and prying out. As I pry, you can probably see that piston go back down in there. So you want to do that, make sure you get those pistons back in as far as you can, and then we'll take these 14 mm bolts off by hand. Now most likely what you'll need to do is take your big screwdriver again and probably pry up right here, and pry up right here. Mine is coming apart easy because I've had it apart before. Then your caliper comes off, and you want to put that right up there. Now here are your brake pads. If you're looking just to replace the brake pads, you can probably pry them off. There's the front one, and then the rear one. You want to judge the condition of your rotors. These rotors look pretty nice, and that's because they've actually already been machined. The owner of this vehicle had his own brake lathe, so he decided to turn the rotors himself. So what you want to do is take the back of your fingernail and go up the rotor and feel for any And do it on the backside, too. Feel for any ridges or anything like that. If you feel ridges or something like that, either have the rotors machined or put a new set of rotors on. I'll show you how to do that.
To replace your rotors, there's a set of 18 mm bolts here and here. You'll remove those. You see I have my 18 mm socket, and this is a piece of pipe. How you'd use that is, if you want a little more leverage, put that onto the handle and pull. This is if you don't have a breaker bar. That just helps you get it loose in the beginning. For a vehicle like this, if it's in good shape, just using your ratchet will probably work. The pipe's just a tip if you do come across one that's really tight. Then that bracket comes off, and then your rotors come off. If you do have some trouble getting those rotors off, you can use a hammer. In the nice open space right here, use some impact to get them off. Putting it back together, put the rotor on. What I actually can do is just take 1 lug nut, put it on to hold the rotor in place. Put the bracket back on. Note that the bracket does go toward the inside, close to the rotor. We're going to use a torque wrench to torque these 18 mm bolts to 90 foot pounds. What you want to do is pull these stainless steel slides out, right there and there, and use a wire brush, and just clean them up. We'll put our bottom slide back on, and then the top one. Obviously, you can also clean those when you have this whole bracket off. If you don't have the rotors off, I just want to show you how to take them off. Okay, our old pads.
Actually, these pads actually have a little bit of life in them. This line down the middle is the wear indicator. So it's meant to, if you're looking at it like this, you can see how much life is left. But they were worn unevenly, so this owner wanted a new set. So the new ones from 1AAuto are exactly the same. Put them down in. If you didn't get your pistons back in enough with the screwdriver method that I showed you before, basically what I'm doing is taking a large C-clamp and a piece of wood because this car does have dual piston calipers, and you tighten up the C-clamp. And that piece of wood just helps push both the pistons back in at the same time. You definitely need to do this when you're replacing pads because the pads are much wider, so you have to force those pistons down to get it all back together. If you had 2 C-clamps you could press one down and then the other, but it works good with one piece of wood. Before you put your caliper on, just make sure that these slides are nice and free. Those do have flat spots that hold them in the caliper so the flat spot should be right on top and bottom. Take a caliper. Might have to push those slides in a little bit- and the 14 mm bolts.
Just lift up the caliper, shake it a little bit. And these bolts we're going to torque to 30 foot pounds. You might say that doesn't seem like a lot. All these bolts really do is hold the caliper in place and let it slide back and forth. What takes the braking pressure is this large bracket here, so that's why we tighten those up to 80 foot pounds, or to 90 foot pounds. So now we'll use a little fast forward. Pull your wheel around, take that lug nut off. Now we're going to throw the tire back on. Put the lug nuts on by hand first so you don't cross thread anything. Then I'll just tighten them up preliminarily with the wrench, and then I will let the vehicle down on the ground and torque the lug nuts to 100 foot pounds. So here I'm torqueing them, and I'm using a star pattern, which is crossing. One other very important thing as you're watching me put on the hubcap, make sure, when you first drive your vehicle, pump your brakes a bunch of times. Then make sure your brakes hold the car in park, then do a stop from 10 miles an hour before you road test, just to make sure the brakes get reseated.
We hope this helps you out. Brought to you by www.1AAuto.com, your source for quality replacement parts and the best service on the internet. Please feel free to call us toll free, 888-844-3393. We're the company that serves you on the internet and in person.
Tools used
Brought to you by www.1AAuto.com. Your source for quality replacement parts and the best service on the internet.
Hi I am Mike Green. I am one of the owners of 1A Auto. I want to help you save time and money repairing or maintaining your vehicle. I am going to use my 20 plus years experience restoring and repairing cars and trucks like this, to show you the correct way to install parts from 1aauto.com. The right parts installed correctly; that's going to save you time and money. Thank you and enjoy the video.
In this video we are going to show you a rear brake pad and rotor removal and replace on this 2004 Crown Victoria; basically the same as most of this generation vehicle with the rear disc brakes. Tools you will need are a large flat blade screwdriver, a 13/16 inch socket and ratchet or tire iron, jack and jack stands, 10mm socket and ratchet, brake spoon, and a pry bar and hammer if your rotors are frozen to the axle.
First you want to pop your center cap. Then you want to unscrew these caps. You may need to use a wrench to loosen them up first. If you are using hand tools, you want to have the vehicle on the ground. Loosen up your lugs nuts and then jack up the vehicle, secure it, and remove the lug nuts. I'm using an air wrench. There's two 10mm bolts in behind. One right here and one right here. Now what you want to do is take a large screwdriver and you got to put it right in here. You can kind of pry the caliper out like that. What that does is it actually pushes the piston back in to the caliper, which you need to do before you put new brake pads on.
The caliper should be nice and loose. There is a little bracket here, you push down, and pull your caliper up and off. Then your brake pads, the inside one should just pull right out. Use the screwdriver and you pry these little indentations right here, and your outer one comes right out. You can lay your caliper back there. As you can see, our rotors have already been resurfaced so we're not going to replace them. If you did need to take your rotors off or replace them, what you would want to do first is come back here and remove this little rubber plug, which you can usually do with your finger or a screwdriver. Then you are going to loosen up your emergency brake. I am going to show you this with the rotor off because it is just easier to understand.
There is where that hole comes through. You can see there is a little adjuster here. To loosen your brakes up, you want to get your screwdriver in there and you want to grab hold of that adjusting star and then go towards the rear end with your screwdriver. That's the same for both sides. On this side, this is the passenger side, the star is up here. On the driver side all they do is flip this adjuster around and the star is down lower. To loosen the E-brake shoes, you want to grab hold the star and push towards your axle and loosen it up quite a bit.
The proper tool to do this is a brake spoon because it has the correct angle to it. You can also use just a regular screwdriver. Basically you want to look inside there, on the passenger side it's up high. You just want to get in there with a screwdriver and loosen it right up. You got to feed it in there, grab the tooth, and pull it. You basically just do it one tooth at a time. When we took this car apart, we actually ran into an issue where the rotors were basically frozen on to the axle. First part of that is making sure you loosen up your emergency brake. The next part what you want to do is probably have two people, have a helper, large crowbar, feed right in here, and obviously this is going to come off easy because we've already had it apart.
What you would do is put a lot of outward pressure here and then use your hammer to bang really hard on the rotor. What that does is it vibrates it and it frees it up. Eventually you can pry it right off. Like I said, I've already had this vehicle apart so my rotor comes off. While you have the rotor off what you'll may want to do is clean up that adjuster for the emergency brake. Put a little bit of oil on it so it moves freely. Obviously putting it back on, put the rotor on, make sure you get it all the way on. Tighten that E-brake back up. I'm going to use my spoon because it's a little easier. Tightening is grabbing the star and moving it back. Basically I want to tighten this up until I can't move it very easily. I can feel some friction so it's pretty well adjusted. Don't forget to put your little plug back in for the emergency brake adjuster.
Now I put it back together. New pads from 1AAuto just like the old pads. The inside has a little clip on it. You just put it in the caliper and force it in. This locking bracket you want on top. For your outers there is a left and a right side. It just kind of goes in, push the inside down. Once you've got the pads on, before you put it together you want to make sure these slides are sliding back and forth nice and easy. You will probably want to press them out a little bit to get it on. One of the pads has kind of teeth so you want to get the bottom down on first. Make sure it's all the way in. Pull this slide out, and I'm pulling on the top here as I'm pushing it down in. now it's locked into place. Now my two bolts. Basically put them in; you may need to shake it around a little bit. They should go right in.
Now I am going to tighten these up to 20 foot pounds. I know that doesn't sound like a lot and it really isn't. These bolts just hold the caliper in place. This big heavy bracket here is what really takes the braking pressure. You only take them up to about 20 foot pounds. Now we're ready to put our wheel and tire back on. We'll fast forward through putting the tire back on. Put the tire on then thread the lug nuts on by hand first. Tighten them up preliminarily then lower the car down. You want to torque the lug nuts to 100 foot pounds. Then put the wheel cover on. Very important, whenever you do brakes before you drive the car anywhere, pump the brakes a bunch of times and then make sure that the brakes hold the car when you put it in drive or reverse. Do a stop from five miles an hour and ten miles an hour just to make sure the brakes are all reseated before you take it out and road test it. Put the cap back on and put the center cap back on.
We hope this helps you out. Brought to you by www.1AAuto.com. Your source for quality replacement parts and the best service on the internet. Please feel free to call us toll free 888-844-3393. We're the company that is here for you on the internet and in person.
Tools used
Tools used
Brought to you by www.1AAuto.com. Your source for quality replacement parts and the best service on the internet.
Hi I am Mike Green. I am one of the owners of 1A Auto. I want to help you save time and money repairing or maintaining your vehicle. I am going to use my 20 plus years experience restoring and repairing cars and trucks like this, to show you the correct way to install parts from 1aauto.com. The right parts installed correctly; that's going to save you time and money. Thank you and enjoy the video.
In this video we are going to show you a rear brake pad and rotor removal and replace on this 2004 Crown Victoria; basically the same as most of this generation vehicle with the rear disc brakes. Tools you will need are a large flat blade screwdriver, a 13/16 inch socket and ratchet or tire iron, jack and jack stands, 10mm socket and ratchet, brake spoon, and a pry bar and hammer if your rotors are frozen to the axle.
First you want to pop your center cap. Then you want to unscrew these caps. You may need to use a wrench to loosen them up first. If you are using hand tools, you want to have the vehicle on the ground. Loosen up your lugs nuts and then jack up the vehicle, secure it, and remove the lug nuts. I'm using an air wrench. There's two 10mm bolts in behind. One right here and one right here. Now what you want to do is take a large screwdriver and you got to put it right in here. You can kind of pry the caliper out like that. What that does is it actually pushes the piston back in to the caliper, which you need to do before you put new brake pads on.
The caliper should be nice and loose. There is a little bracket here, you push down, and pull your caliper up and off. Then your brake pads, the inside one should just pull right out. Use the screwdriver and you pry these little indentations right here, and your outer one comes right out. You can lay your caliper back there. As you can see, our rotors have already been resurfaced so we're not going to replace them. If you did need to take your rotors off or replace them, what you would want to do first is come back here and remove this little rubber plug, which you can usually do with your finger or a screwdriver. Then you are going to loosen up your emergency brake. I am going to show you this with the rotor off because it is just easier to understand.
There is where that hole comes through. You can see there is a little adjuster here. To loosen your brakes up, you want to get your screwdriver in there and you want to grab hold of that adjusting star and then go towards the rear end with your screwdriver. That's the same for both sides. On this side, this is the passenger side, the star is up here. On the driver side all they do is flip this adjuster around and the star is down lower. To loosen the E-brake shoes, you want to grab hold the star and push towards your axle and loosen it up quite a bit.
The proper tool to do this is a brake spoon because it has the correct angle to it. You can also use just a regular screwdriver. Basically you want to look inside there, on the passenger side it's up high. You just want to get in there with a screwdriver and loosen it right up. You got to feed it in there, grab the tooth, and pull it. You basically just do it one tooth at a time. When we took this car apart, we actually ran into an issue where the rotors were basically frozen on to the axle. First part of that is making sure you loosen up your emergency brake. The next part what you want to do is probably have two people, have a helper, large crowbar, feed right in here, and obviously this is going to come off easy because we've already had it apart.
What you would do is put a lot of outward pressure here and then use your hammer to bang really hard on the rotor. What that does is it vibrates it and it frees it up. Eventually you can pry it right off. Like I said, I've already had this vehicle apart so my rotor comes off. While you have the rotor off what you'll may want to do is clean up that adjuster for the emergency brake. Put a little bit of oil on it so it moves freely. Obviously putting it back on, put the rotor on, make sure you get it all the way on. Tighten that E-brake back up. I'm going to use my spoon because it's a little easier. Tightening is grabbing the star and moving it back. Basically I want to tighten this up until I can't move it very easily. I can feel some friction so it's pretty well adjusted. Don't forget to put your little plug back in for the emergency brake adjuster.
Now I put it back together. New pads from 1AAuto just like the old pads. The inside has a little clip on it. You just put it in the caliper and force it in. This locking bracket you want on top. For your outers there is a left and a right side. It just kind of goes in, push the inside down. Once you've got the pads on, before you put it together you want to make sure these slides are sliding back and forth nice and easy. You will probably want to press them out a little bit to get it on. One of the pads has kind of teeth so you want to get the bottom down on first. Make sure it's all the way in. Pull this slide out, and I'm pulling on the top here as I'm pushing it down in. now it's locked into place. Now my two bolts. Basically put them in; you may need to shake it around a little bit. They should go right in.
Now I am going to tighten these up to 20 foot pounds. I know that doesn't sound like a lot and it really isn't. These bolts just hold the caliper in place. This big heavy bracket here is what really takes the braking pressure. You only take them up to about 20 foot pounds. Now we're ready to put our wheel and tire back on. We'll fast forward through putting the tire back on. Put the tire on then thread the lug nuts on by hand first. Tighten them up preliminarily then lower the car down. You want to torque the lug nuts to 100 foot pounds. Then put the wheel cover on. Very important, whenever you do brakes before you drive the car anywhere, pump the brakes a bunch of times and then make sure that the brakes hold the car when you put it in drive or reverse. Do a stop from five miles an hour and ten miles an hour just to make sure the brakes are all reseated before you take it out and road test it. Put the cap back on and put the center cap back on.
We hope this helps you out. Brought to you by www.1AAuto.com. Your source for quality replacement parts and the best service on the internet. Please feel free to call us toll free 888-844-3393. We're the company that is here for you on the internet and in person.