Replaces
This part doesn’t fit a . Select from parts that fit.
Frequently bought together
Item Condition:
New
Attention California Customers:
 WARNING: This product can expose you to chemicals including Chromium (Hexavalent Compounds), which is known to the State of California to cause cancer, and birth defects or other reproductive harm. For more information, go to www.P65Warnings.ca.gov
Lifetime Warranty
This item is backed by our limited lifetime warranty. In the event this item should fail due to manufacturing defects during intended use, we will replace the part free of charge. This warranty covers the cost of the part only.
Returns: Parts with electrical components cannot be returned once installed.
FREE Shipping is standard on Orders shipped to the lower 48 States (Contiguous United States). Standard shipping charges apply to Hawaii, Alaska and US Territories. Shipping is not available to Canada.
Expedited is available on checkout to the United States, excluding Alaska, Hawaii and US Territories as well as P.O. Boxes and APO/FPO/DPO addresses. Final shipping costs are available at checkout.

Created on:
Tools used
Hi, I'm Mike from 1A Auto. We've been selling auto parts for over 30 years. We're dedicated to delivering quality auto parts, expert customer service, fast and free shipping, all backed by our 100% satisfaction guarantee. Visit us at 1AAuto.com, your trusted source for quality auto parts.
The front axle actuator is underneath the front, right side on the front of the front axle. Three 10 millimeter bolts hold it: One there. Just use a wire brush to clean off that one there. Then there's one way up in here. Remove it with a 10 millimeter socket ratchet extension. Unfortunately, it won't work for that one. We'll use a wrench for this 10 millimeter bolt.
We have it up on a lift, but there's no reason you can't crawl underneath your vehicle. A great tool is a ratcheting wrench for this one. The actuator's held in place by a C-clamp here. The case is aluminum, and ours is stuck in there, so we're just going to put some rust penetrant around it. Hopefully, we can get in there and free it up. You pull the boot back. You want to avoid damaging that rubber boot. Clamp on there and see if we can drive it out. Use something smaller to be able to drive it the rest of the way through. Pull it out the rest of the way, and then disconnect your vacuum lines. Twist and pull off the orange ones towards the actuator and the blue one's towards the flat part.
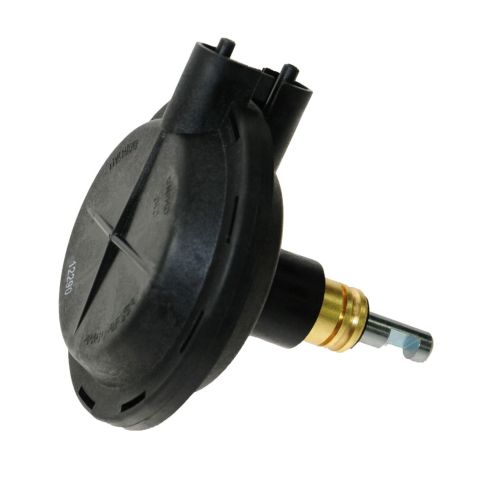
Here’s the original actuator from the vehicle and the new one from 1A Auto. You can see that they are exactly the same. They have the same vacuum fittings, same shaft, and new one from 1A Auto is going to have the full range of motion all the way out and all the way back in a little over the three quarters of an inch. You can see what happens with these original ones. It's lost its range of motion and it's not working properly, so it's not engaging the axle. This happens often. This is one of the reasons why they suggest that you shift into four-wheel drive every once in a while even when you don't need it to keep these working correctly. The one from 1A Auto is going to go in just like the original mount and fix up the problem.
Use some abrasive sandpaper or scaling pads to try and clean up inside the mounting hole as well as possible. We've got a small grinding bit, and we're just really going clean out this hole to make it easier to mount the new one. The actuator has a little detent right here. We've put some grease on the outside. That detent has to line up right there, so I just fill it. With the grease and everything cleaned out, it should go right in. Just make sure you got it properly lined from the backside here, and then a tap with a rubber mallet. Should seat it in the rest of the way. Still have the rubber boot. The port in between the actuator and the arm. Push the actuator. Seat the actuator, and install your C-clamp. Clean up our C-clamp so it's as thin as it can be. I'm going to put the boot back on. Then the vacuum lines. The pink or orange one goes to that side. Push on and twist. Then the blue one goes to this side. Put your cover back up in and put the three bolts on that hold it.
Thanks for watching. Visit us at 1AAuto.com for quality auto parts, fast and free shipping, and the best customer service in the industry.
Tools used