Replaces
This part doesn’t fit a . Select from parts that fit.
Frequently bought together
Part Details
Assemblies may include halogen or incandescent test bulbs that should be replaced before installation.
Features and Benefits
Item Condition:
New
Attention California Customers:
 WARNING: This product can expose you to chemicals including Chromium (Hexavalent Compounds), which is known to the State of California to cause cancer, and birth defects or other reproductive harm. For more information, go to www.P65Warnings.ca.gov
This item is backed by our limited lifetime warranty. In the event this item should fail due to manufacturing defects during intended use, we will replace the part free of charge. This warranty covers the cost of the part only.
The bulbs are for testing and not covered under our warranty. Our warranty applies to the light assembly only.
FREE Shipping is standard on Orders shipped to the lower 48 States (Contiguous United States). Standard shipping charges apply to Hawaii, Alaska and US Territories. Shipping is not available to Canada.
Expedited is available on checkout to the United States, excluding Alaska, Hawaii and US Territories as well as P.O. Boxes and APO/FPO/DPO addresses. Final shipping costs are available at checkout.
Created on:
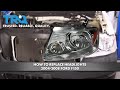
Tools used
Okay, friends. To start doing this headlamp, what we need to do first is of course pop the hood. Once you have the hood up, you'll have a clear view of what's going on. There's a little push clip here, it has a center area that you need to lift up and out. Usually I'll just use a small pocket screwdriver, try to get under it, and see if I can lift a little bit. Then I'll just use a Phillips head, and I can pop that right out of there. Once the center is out, the rest of it should kind of just pop up and we'll set this aside. If your bolts are rusted like mine are, it's a great idea to just use a little bit of penetrant. So you'll have one here, one here, and then one over there. Using a 10-millimeter socket, remove your 3 mounting bolts.
Next is gonna be a two-step process. First, we're gonna grab this little tab and pull it out of the hole. After that, if you were to follow my pry bar that I have in my hand, I'm gonna come right down this way in between the lamp assembly and the body itself. There's a little push clip, we need to separate those two. So I'll use my pry bar, pop it right out. Flashlight out of the way. Remove the lamp assembly. Next, we're gonna remove all of our bulbs. If you just grab onto this and turn it to the left or counterclockwise, you can remove them. If your bulbs look like this, this isn't the best. It's supposed to be amber-colored, so I would have to replace this bulb. The bulb itself is a 3157 and it would be an NA bulb because it should be amber. We'll set that aside for now. Grab the headlamp, remove that as well. Then this one. We'll set all these aside. There is our headlamp, friends. I'm just gonna get this out of here. I've got my nice new bulb. Awesome. I'm gonna replace this one as well. 194. Now it's gonna be time to get our new lamp assembly in here. We'll turn it around to the backside and start putting in our bulbs. I'm gonna start with the marker light here that goes all the way on the outside. I'm just gonna line up the little slots, turn it to the right, and it locks in. Do the same to all the rest of the bulbs.
Perfect. Next, we're gonna install the headlamp assembly into the body of the vehicle. Something to pay attention to is this area right here. This is the little push clip that we had a little bit of an issue with. So we're gonna make sure we have that lined up. We'll make sure we have our little piton, so it's gonna be lined up here. And of course, you wanna make sure that this is lined up as well. Give it a nice little push. Okay, that's definitely in there. My piton fell into the hole, so I'm excited about that. Now let's put in our mounting bolts.
Now the next thing we need to do is obviously test the bulbs to make sure that they work. Once you're sure that they work, of course, you're gonna wanna align your headlamp assembly. The alignment for this is located right here. You would turn this counterclockwise to make your beam go up and clockwise to make your beam go down. Let's give these a test. We've got headlights, high beam, and of course the directional. Perfect. Let's not forget to get this back up on there. Get this up. We've got our push clip. You push in the outer portion first, and then you lock it in by pushing in the center. That's great.
This is going to be a general tutorial on how to aim your brand new TRQ headlamp assemblies. Okay. So looking at your brand new TRQ headlamp assembly, you're gonna see where your low beam is, and you'll see a little dot right in the center and that is the axis point. Okay? So what we're gonna do is we're gonna mark that with an erasable marker just so it's easier to see. Next, what we need to do is measure from the level ground up to this point and take note of that measurement. Now we're just gonna pull the car up to our wall. On our vehicle, we remember that the measurement was 28 inches for our axis point. Your vehicle may be different, but that's where I'm gonna put this tape just above that 28 inches. We'll do the same on the other side. Okay. So let's just back the vehicle up straight back 25 feet from the wall. And now that we moved our vehicle 25 feet back from the wall, we're gonna start with our measurement here. That's where the headlamp center is. We're gonna go down 4 inches on the driver's side. On the passenger side, we have our line here. What we need to do is go down 2 inches.
To adjust the driver's side, we're gonna cover our passenger side headlamp. If you look at the backside of your headlamp assembly, you're gonna see something that looks like this. This is the adjustment. Some of these headlight assemblies have one, two, or even more of them, but you should at least have one. This is how we're gonna adjust the headlight beam. Now we're gonna lower the top part of the beam down to just below this line. When you turn the adjustment to the right, it brings the beam up, and if you turn it to the left, it'll bring the headlight beam down. And this is this way on most vehicles. Let's continue on to doing the passenger side. All right. We properly aligned our TRQ headlamp assemblies.
Okay. And on the quality TRQ headlamps for our pickup truck, the procedure is gonna be the same. You're gonna find your center dot, mark it, and then you'll measure from the level ground up to your dot. So once your headlamps are properly adjusted, it'll be time to adjust your foglamps. You'll notice on the driver side, the focal point is all the way at the bottom right now. I would like to bring it up so it meets up with approximately the bottom of the focal point of the headlight. Some foglamps have an adjuster, others don't. The ones that do have an adjuster, you would just turn the adjustment to the left or to the right to adjust the beam up and down to where it needs to be. Now with your TRQ headlamps and foglamps properly aligned, you can drive down the road safely.