Replaces
This part doesn’t fit a . Select from parts that fit.
Frequently bought together
Part Details
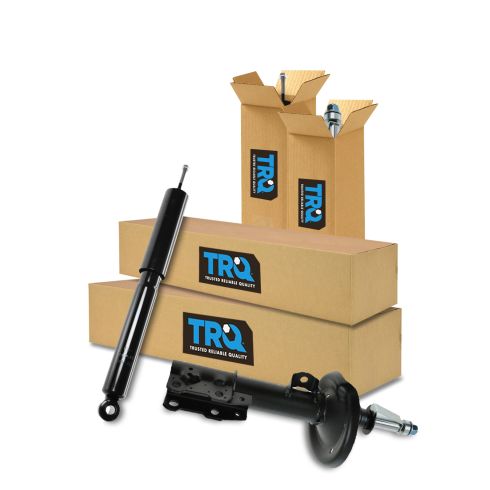
Our direct fit gas-charged strut assemblies help to restore your vehicle’s handling and ride quality to just like new.
Our direct fit gas-charged shock absorbers help restore your vehicle's handling and ride quality to just like new.
Item Condition:
New
Attention California Customers:
 WARNING: This product can expose you to chemicals including Chromium (Hexavalent Compounds), which is known to the State of California to cause cancer, and birth defects or other reproductive harm. For more information, go to www.P65Warnings.ca.gov
Lifetime Warranty
This item is backed by our limited lifetime warranty. In the event that this item should fail due to manufacturing defects during intended use, we will replace the part free of charge. This warranty covers the cost of the part only.
FREE Shipping is standard on orders shipped to the lower 48 States (Contiguous United States). Standard shipping charges apply to Hawaii and Alaska.
Shipping is not available to a P.O. Box, APO/FPO/DPO addresses, US Territories, or Canada for this item.
Expedited is available on checkout to the United States, excluding Alaska, Hawaii.
Final shipping costs are available at checkout.


Created on:
Tools used
Brought to you by 1Aauto.com, your source for quality replacement parts and the best service on the Internet. Hi, I'm Don from 1A Auto. I hope this how-to video helps you out, and the next time you need a part for your vehicle, think of 1AAuto.com. Thanks.
In this video, we're going to show you how to replace the rear shock on this 2007 Pontiac G6. Pretty much the same for any 2005 to 2010 G6, as well as the Saturn Aura. We'll show you the right hand, or passenger side. The driver's side is the same procedure, and we always recommend you replace your shocks in pairs. The only thing you'll need, you will need a jack and jack stands. You will need 13, 19, and 21mm sockets, also as well as a ratchet, an extension, and probably a breaker bar or a pipe for some extra leverage.
Take it, and depending on what wheels you have, this has wheel covers, so you unscrew the caps, and then the wheel cover comes off. If you don't have the benefit of air tools, you'll want to loosen the lug nuts with the vehicle on the ground, then raise and secure the vehicle, and then remove the lug nuts, wheel, and tire. Two 13mm nuts hold the shock at the top. We'll fast-forward here as we remove those two 13mm nuts. A 21mm bolt holds the shock at the bottom. We'll use a 21mm ratchet. We'll put a pipe on there for some extra leverage. It made it come off really easy. He probably can get it off easily enough with just the ratchet.
Our car is new enough that this shock is not worn out at all, so we're just going to reinstall the original one. We just wanted to show you this video, just so you know how to do it. The shocks we sell at 1A Auto are great replacements. You can see, you put the shock back in place, and then start those two nuts on the top. I will fast-forward, as we finish putting those nuts on. I then start the bolt at the bottom, and tighten it up. The bottom bolt, you want to tighten to probably about 45 to 50 foot-pounds, and the top bolts, you want to tighten up afterwards, between 20 and 25 foot-pounds. Keep the speed up here, as we put our wheel and tire back on, and just start the lug nuts on there by hand first, then tighten them preliminarily. With the car back down on the ground now, we'll tighten the lug nuts to 100 foot-pounds, using a star pattern.
Last but not least, put our wheel cover on there, and then put the caps on carefully, only using hand power to tighten those caps up.
We hope this helps you out. Brought to you by www.1AAuto.com, your source for quality replacement parts and the best service on the Internet. Please feel free to call us toll-free 888-844-3393. We're the company that's here for you on the Internet and in person.
Tools used
Okay, friends. The first thing you need to talk about anytime you're working on your vehicle is safety. You want hand and eye protection. With that said safely raise and support your vehicle so the wheels are off the ground. Once you've done that, we're going to remove all five of our 19-millimeter lug nuts. Remove your wheel.
Once you have the wheel off, it's important to remember that we're actually going to want to try to raise this up a little bit. We want to take the pressure off of your shock so it's not fully extended. If you were to try to take out this bolt right now, once you finally got it to almost the end, the suspension is going to want to drop and you might damage the threads inside of your knuckle. And now, we're gonna remove this bolt right here using a 21-millimeter socket. Next, we need to remove our two upper mounting nuts. Just remember when you remove these, there's going to be nothing holding your shock up. So, after you remove one, make sure you have full grasp on it. Go ahead and remove this from the vehicle. Next, we're going to remove this upper nut to get off the upper mounting from the shock. Every time I get shocks, I always like to charge them up before I install them. What I mean by that is to go ahead and press this down as far as it can go, let it completely come all the way up, and then repeat the process three to five times. Let's take our new shock. Take the nut off of there, and we'll remove both of these. Now, let's get our pieces on. We're going to put it just like this. Now, let's grab this piece, slide that right over. Put this facing in like that. And this right here. All right. Let's tighten this. Perfect.
Let's get ready for our install. You'll notice if you put this on backwards because the shock won't be at the right angle. Put on both those nuts, if you want to use a little thread locker, we'll call it your prerogative. We'll snug these up. Torque them to 18 foot-pounds. All right. Let's get our shock lined up here. Take your bolt, slide it through. Take your washer. Make sure you don't forget to put that in there. It's easy to forget. That on there. Okay. Now you might need to lift up or down on the shock to try to get it to line up. Now, let's torque this to 133 foot-pounds. Get our jack out of here. Wheel up on here. We'll start on the lug nuts and then we'll torque them down to 100 foot-pounds. Let's torque these to 100 foot-pounds in a criss-cross manner. Torqued.
Tools used
Tools used


