Replaces
This part doesn’t fit a . Select from parts that fit.
Frequently bought together
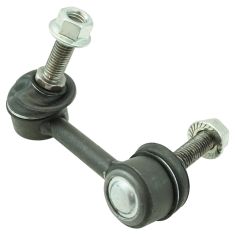
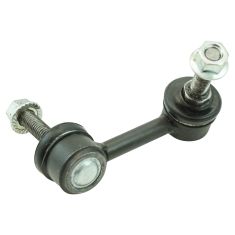
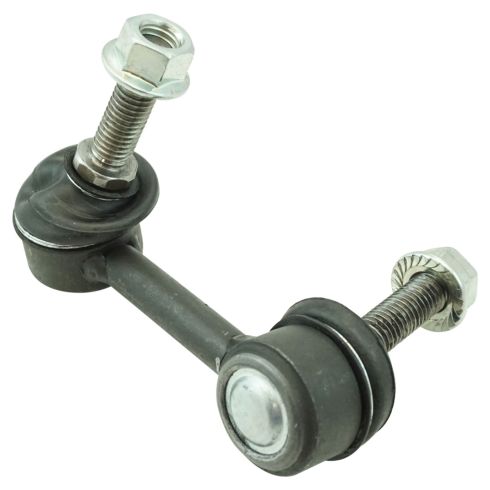
Part Details
Our steering and suspension components are pre-greased and sealed for long life and do not require the extra maintenance typically required by greaseable versions.
Item Condition:
New
Attention California Customers:
 WARNING: This product can expose you to chemicals including Lead and Lead Compounds, which are known to the State of California to cause cancer, and birth defects or other reproductive harm. For more information, go to www.P65Warnings.ca.gov.
Lifetime Warranty
This item is backed by our limited lifetime warranty. In the event that this item should fail due to manufacturing defects during intended use, we will replace the part free of charge. This warranty covers the cost of the part only.
FREE Shipping is standard on Orders shipped to the lower 48 States (Contiguous United States). Standard shipping charges apply to Hawaii, Alaska and US Territories. Shipping is not available to Canada.
Expedited is available on checkout to the United States, excluding Alaska, Hawaii and US Territories as well as P.O. Boxes and APO/FPO/DPO addresses. Final shipping costs are available at checkout.
Created on:
Tools used
Brought to you by 1AAuto.com, your source for quality replacement parts and the best service on the Internet.
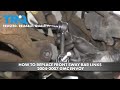
Hi, I'm Mike from 1A Auto. I hope this how-to video helps you out, and next time you need parts for your vehicle, think of 1AAuto.com. Thanks.
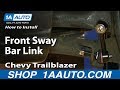
In this video, we're going to show you how to replace a sway bar link of this 2003 GMC Envoy XL. We show you on the passenger side, but the driver's side is a similar procedure. The items you'll need are a new sway bar link from 1AAuto.com, 7mm and 19mm socket and ratchet, 17mm and 18mm wrenches, 4.5mm Allen wrench, flat blade screwdriver, torque wrench, jack and jack stands, and depending on the condition of your vehicle, you may also need a pry bar and a reciprocating saw.
Start out by removing the wheel and tire. Pry off the hubcap. If you don't have the benefit of air tools, keep the wheel on the ground. Loosen the lug nuts first, then raise and secure the vehicle. For this repair you have to lift up both front tires evenly. Use jack stands to secure it. Then remove the lug nuts, wheel, and tire.
Start off by just lightly spraying the nut with some penetrating oil on both sides of your sway bar link. You want to make sure it doesn't get into the hole on the front of that stud because you want to make sure that the Allen wrench can stay in there. Place an 18mm wrench onto the nut and then, using a 4.5mm Allen wrench, just stick it into that stud. Then, just remove that nut. Now, you may need to clean out the inside of that stud so you can get the Allen wrench in there, on the back here. Ours was filled with dirt. We just scrape it out with a flat blade screwdriver. Then repeat the process that you had done on the lower stud.
On our vehicle we had an issue. We basically got the nut off on the top side. We got it mostly off, but then the nylon locking just locked it up and we couldn't get it out anymore. We're using a reciprocating saw to cut the stud on the sway bar link. We're using that pry bar. We're just supporting it so that the sway bar doesn't move up and down as we're using the saw. Hopefully you don't have to get to this point, but if you do this is how you can overcome not being able to get the nut off or if it's broken or frozen or anything like that.
On the right, is the old link. On the left, is the new one. You can see they are similar and they're going to fit exactly the same. Take your new sway bar link and just put the grease fittings into place. Using a 7mm socket and ratchet just tighten up those grease fittings. Push the studs on the sway bar link back into place. Then twist the nuts into place. Then just tighten up that 18mm nut and hold the inside nut with a 17mm wrench. Repeat the process with the other stud.
Replace your wheel. Replace the lug nuts and tighten them up preliminarily. Lower the vehicle, tighten them the rest of the way and torque each of them to a hundred foot pounds in a crossing pattern.
We hope this video helps you out. Brought to you by www.1AAuto.com, your source for quality replacement parts and the best service on the Internet. Please feel free to call us toll-free, 888-844-3393. We're the company that's here for you on the Internet and in person.
Tools used
Okay, friends, one of the first things we need to do to start this job is to safely raise and support the vehicle. I like to raise it directly on the frame. Once you have the wheel off the ground, we're going to remove our center cover. That exposes our 19-millimeter lug nuts. Remove them all and then remove the wheel. Okay. So we took the wheel off so we have a nice, clear view of the sway bar link here. You don't necessarily have to, but it makes it easier to see. What you're going to need is a 7-millimeter Allen head. I'm going to come right in here and I'm just going to give it a couple of nice bonks. Now we're going to take our 21-millimeter wrench, put it right over this nut. The next thing we're going to do is use a ratchet or an air gun, whatever you have, put it on here. And when we turn this, we actually want to try to turn it so we're tightening. It's going to sound weird, but essentially we want the ratchet so it's tightening and the wrench so it's turning to the left. We'll break that free and then we'll go like this, and what you'll notice is it starts loosening up. Remove that completely. There we go. Do the same to the top.
Okay. I'll get my tool off of here. There we are, friends. Once you've compared the new sway bar link to your old sway bar link, it's going to be time for the install. You're going to notice your new sway bar link came with some nice new washers. Those washers are going to go on before you install. Slide them right in, and they're going to go up against this nutted area. Start it in the control arm, and then I'll put it in the sway bar. I'm just going to get this bent down. Slide it right in there. Perfect. We've got our two nuts here. Start them both on. Now it's going to be time to tighten these up. To get onto that nut that's on the inside there, use your 17-millimeter wrench. Now I'm going to use a 21-millimeter and I'm going to snug this up. All right. That bottomed out. Do the same to the other one and then we'll torque them down. Now we're going to torque these to 107 foot-pounds.
It's always a great idea to double-check everything that you removed and replaced. Just make sure everything's secure and good to go. Once you've done that, let's go ahead and get the wheel up on here. Bring the vehicle down so the tire is just barely touching the ground, so it can't spin. And then torque the wheels in a criss-cross manner to 103 foot-pounds. Now it's going to be time to get our center cover on here. If you were to turn it around, you might see something that looks a lot like a valve stem. Line it up with your valve stem and then go ahead and pop it on there.
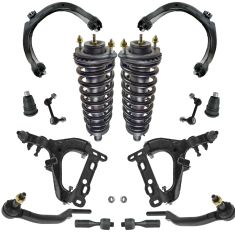
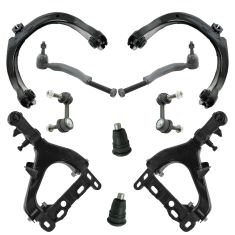
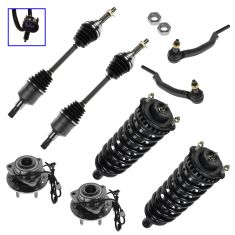
Replaces Chevrolet GMC Olds Isuzu Front 14 Piece Steering & Suspension Kit TRQ PSA66952
$639.95
Replaces 2002 Chevrolet GMC Olds Front 12 Piece Steering & Suspension Kit TRQ PSA66892
$469.95
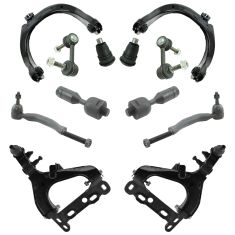
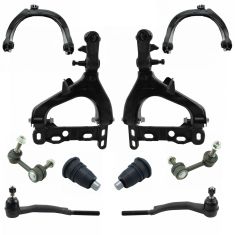
Replaces Chevrolet GMC Olds Isuzu Front 12 Piece Steering & Suspension Kit TRQ PSA66909
$467.95
Replaces 2002 Chevrolet GMC Olds Front 10 Piece Steering & Suspension Kit TRQ PSA66810
$459.95
Replaces Chevrolet GMC Olds Isuzu Front 10 Piece Steering & Suspension Kit TRQ PSA79936
$443.95
Replaces Chevrolet GMC Olds Isuzu Front 8 Piece Suspension Kit TRQ PSA66941
$419.95
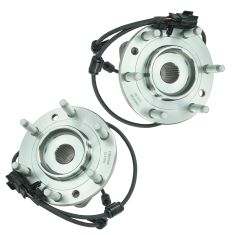
Replaces Front Driver & Passenger Side 2 Piece Wheel Bearing & Hub Assembly Set Timken TKSHS00011
$414.95
Replaces Front 8 Piece Steering & Suspension Kit TRQ PSA59255
$404.95
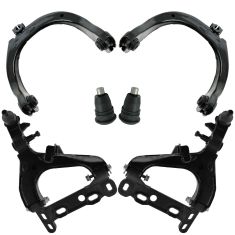
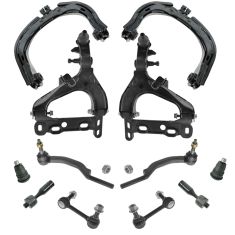
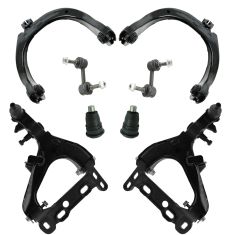
Replaces Chevrolet GMC Olds Isuzu Front 6 Piece Control Arm with Ball Joint Set TRQ PSA65906
$404.95
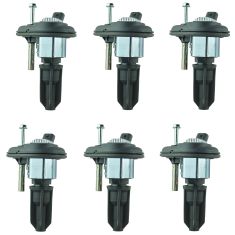
Replaces 6 Piece Ignition Coil Set Delphi DEERK00009
$389.95